
Background
Before we start, be advised this is quite a long page. So get yourself comfortable first. Also, there were a few Facebook comments on the original page (which has now been updated for our mobile visitors). These have unfortunately been lost, but I have put a few excerpts at the bottom of the page. Right, ready? Let's begin.
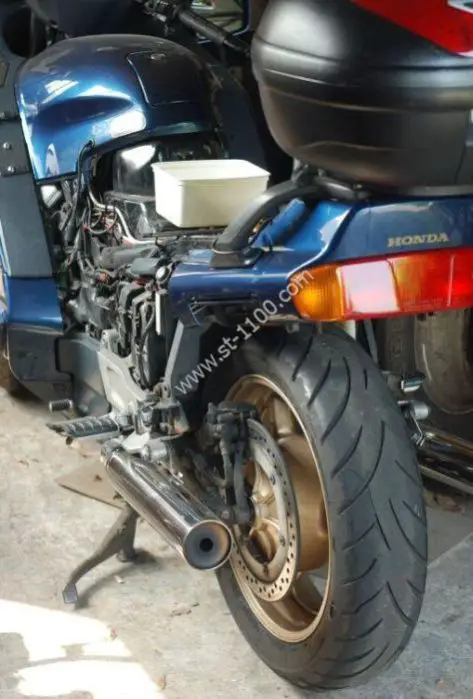
The Pan needed its annual MOT (roadworthiness certificate) - it passed without any problems, but the tester pointed out that the rear swing arm was rusting. "These bikes go for many thousands of miles without a problem, but all of them experience rust in this area", he said. I dutifully promised to look into it.
Now, not being someone who does things by halves, I decided to remove the entire swing arm so that it could be properly inspected, repaired and painted.
Halfway through the operation I found myself asking "Why???"
"Why did I start this?"
"Why not take it to a Honda Dealer?" (Because I'm a cheapskate and begrudge the Honda mechanics charging me an arm and a leg).
So, you're thinking of doing this yourself?
Read on. It's not for the faint-hearted.
Firstly, you'll need the following:
- A selection of screwdrivers, sockets and spanners
- Honda special tool 07908-4690003 (I'll come to that later - there is a CUNNING PLAN for this item)
- A long-handled fargling iron
- Hammer
- Cold chisel, preferably a sharp one
- Angle grinder with cutoff disc
- Large tin of WD-40
- Goggles
- Earmuffs
- Overalls
- Paint
- Flask of tea
- Several days off work
Er, wait a minute. Did you say "Fargling iron?" What's a fargling iron? Read on, you'll see.
So, ready to start?
Remove the panniers, seat and side panels. (I'm not going to detail the procedure for this - if you haven't worked out how to remove the panniers, seat and side panels yet, stop reading now and take the bike to a Honda dealer. Seriously.)
Remove the triangular infill panels (also called pivot covers) near the footrests:
Remove the rear mudguard (this makes access so much easier):
Remove the rear wheel.
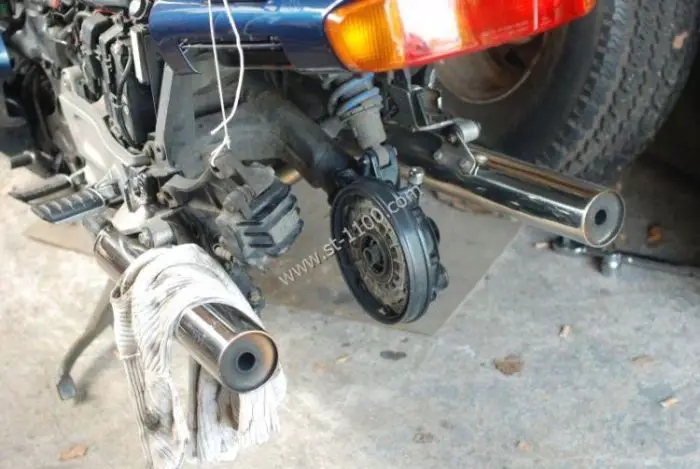
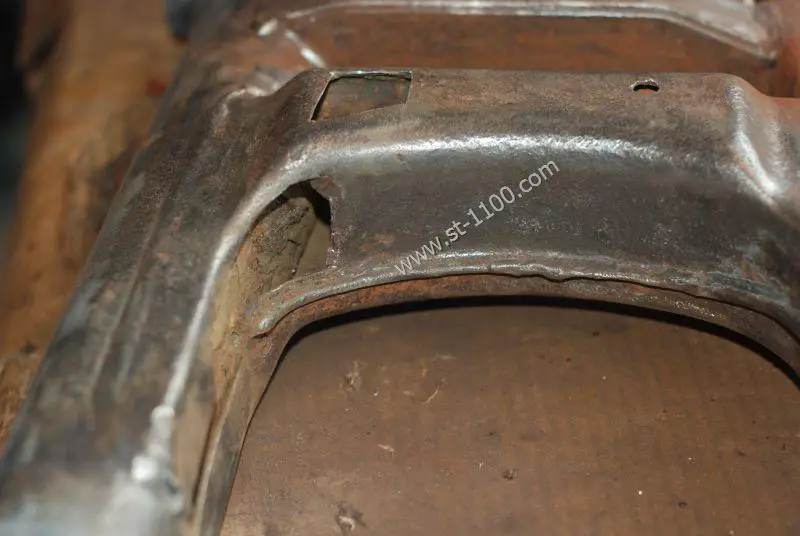
This gave a closer view of what the MOT tester had spotted:
Drain the final drive oil.
Now spray all the bolts that you're going to remove (shock absorber lower mounting bolt, drive assembly bolts, brake line clip bolts) with a penetrating oil - I used WD-40.
Have lunch and a lie-down. You're going to need your strength.
Once you're back, tie up the brake caliper so that the brake hose is not stretched.
Remove the brake line holding clip (the rear one).
Remove the brake line holding clip (the middle one).
Remove the brake line holding clip (the front one - NOW you need your long-handled fargling iron in order to undo the brake line holding clip at the front of the swing arm. It may be easier if you turn the entire ST1100 upside down, but not much. If you know anyone who is triple-jointed with two extra elbows now is the time to call in that favour.)
Failing this, use an 8mm spanner and patience. A lot of patience. Nearly an hour's worth of patience. To remove one bolt. There's just enough room to turn the bolt 1⁄16th of a revolution for every application of the spanner.
So, bolt removed? Go and have a cup of tea. You deserve it.
Later update: it has been pointed out that removing the fuel tank will eliminate the need for a long-handled fargling iron. This is quite true; I removed the fuel tank when I was installing the new Stainless Steel Braided Brake Hoses and noticed that the brake line holding clip is easily accessible this way. It's really not that difficult to remove the fuel tank, and if you're going to be carrying out this procedure, well worth it.
Now remove the lower shock absorber bolt. At around this time you start to wonder why you didn't just take the bike to the Honda dealership in the first place - yes, the bolt IS seized.
Honda in their wisdom decided to make this bolt out of Gruyere cheese - the head rounds off if you just sneeze on it. I found a Stilson wrench a most useful item here.
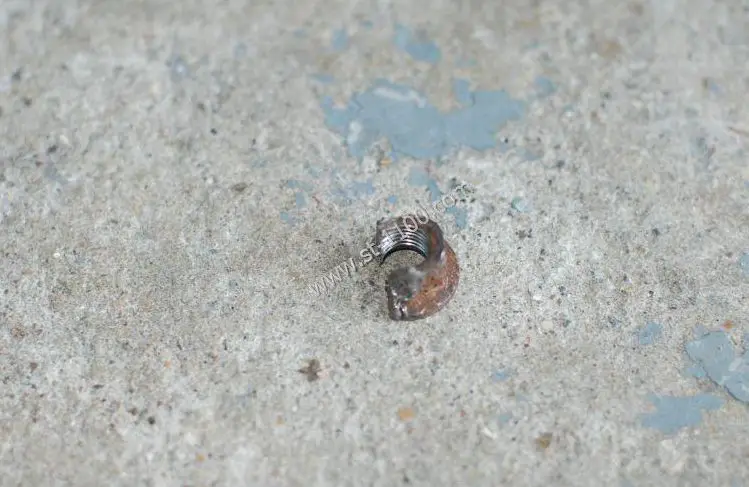
Okay, so the bolt's out. Not in very good condition mind you - but it's out.
Order new bolt.
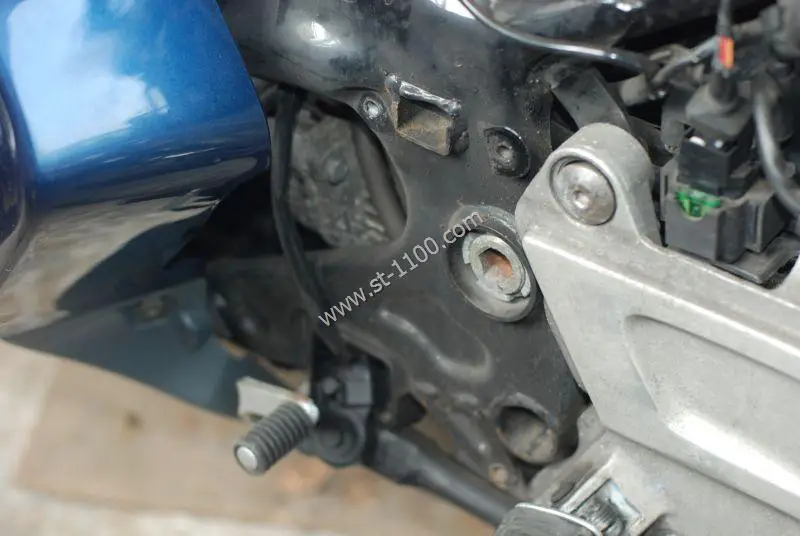
So, now we're ready to remove the drive housing (you DID remember to drain the oil, didn't you?)
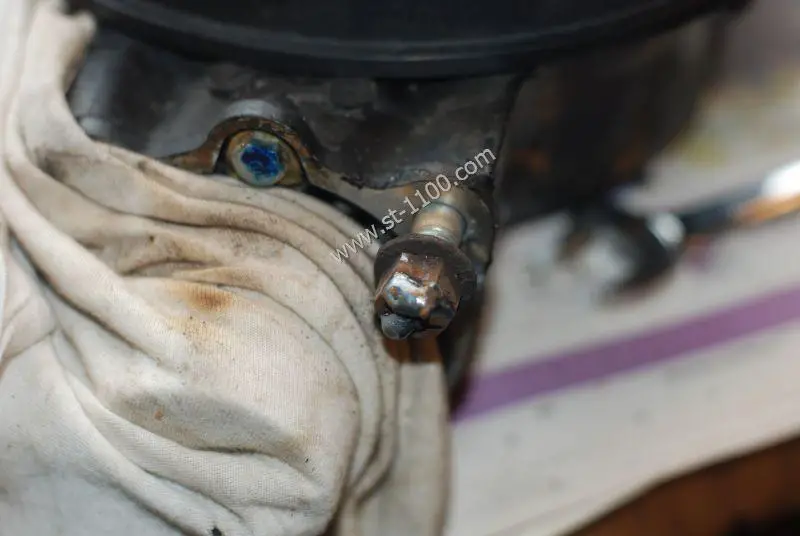
Loosen the 4 nuts holding the drive housing. Well, that's the theory. In practice you will find the nuts are seized to the studs, so the studs themselves unscrew. Never mind. Prepare your angle grinder with a cutting disc for the 4th nut, because not only is this one seized to the stud, the stud itself is seized in the drive housing. Which shouldn't be a problem. Normally.
Carefully cut through 1/4 of the nut. Then with a hammer and chisel you should be able to tap it around until it comes off. Now I'll bet you any money you like that THIS damaged stud is the only one which remains properly in its housing:
The other three nuts come off with studs attached.
Order new studs and nuts.
Now pull the drive shaft as far towards the rear of the bike as you can (as long as you have fingers like Edward Scissorhands and a grip like the Incredible Hulk). Those with stubby fingers will struggle here. This is to disengage the universal joint from the transmission output shaft.
Now in order to remove the swing-arm pivot bolts...
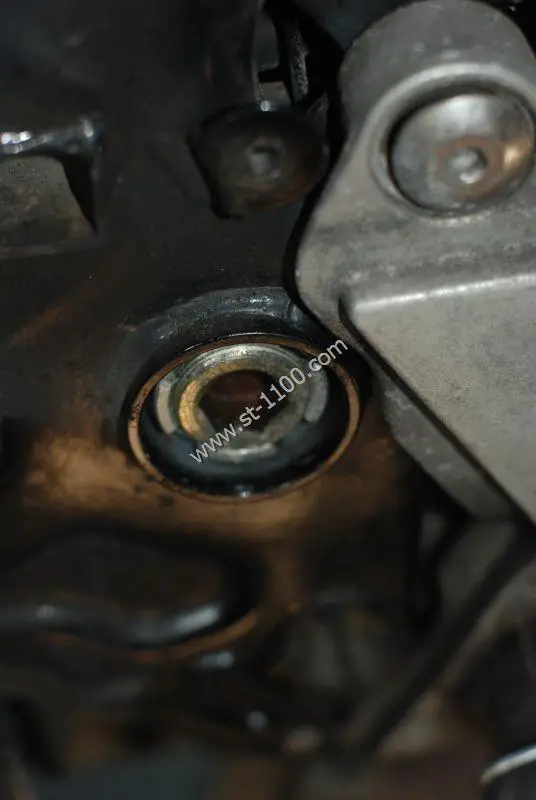
... we need Honda special tool number 07908-4690003. Special tool? Huh! Herewith the cunning plan. I have some "Polymorph" - this is a plastic which is hard at normal room temperature, but if heated to around 70 degrees C becomes soft and malleable. I believe it's the same stuff which is used in hot glue guns. I heated some in hot water, and then pressed it in around the pivot bolt.
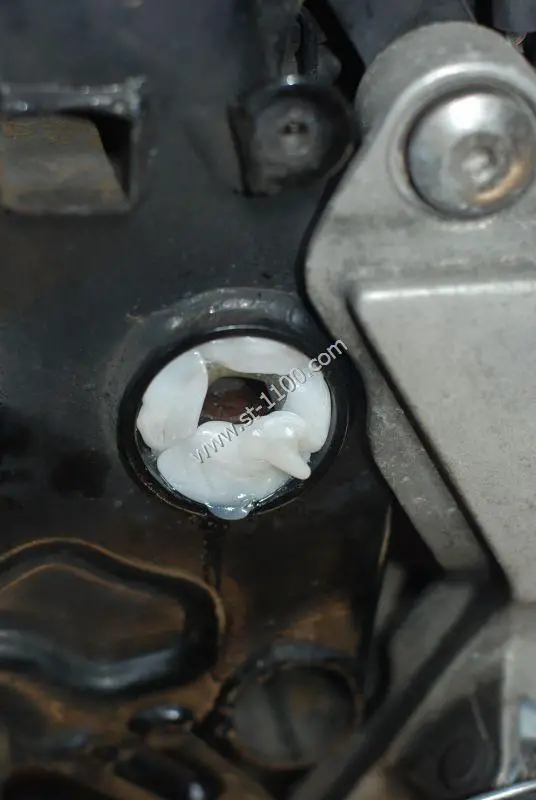
Once it had set (which took a couple of minutes), I carefully removed it. This gave me an impression of what the special tool had to look like.
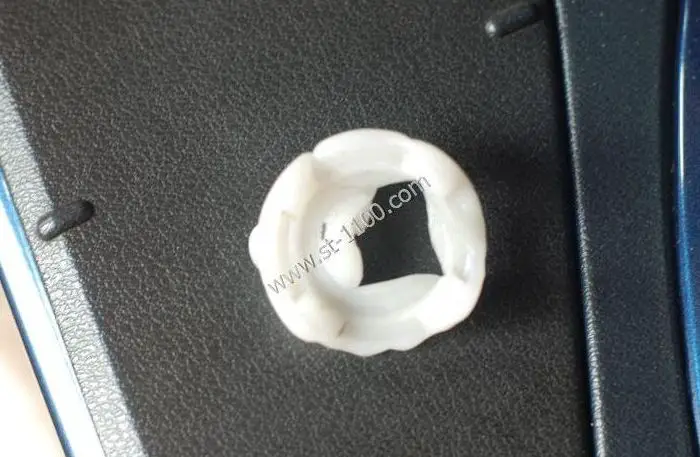
The outside diameter needs to be 38mm. Casting around the workshop, I found an old spade which seemed to fit the bill. I cut off the blade bit, welded a large bolt into one end, then using a hacksaw followed by an angle grinder, trimmed the other end so that there were 4 "cut-outs" of the right size.
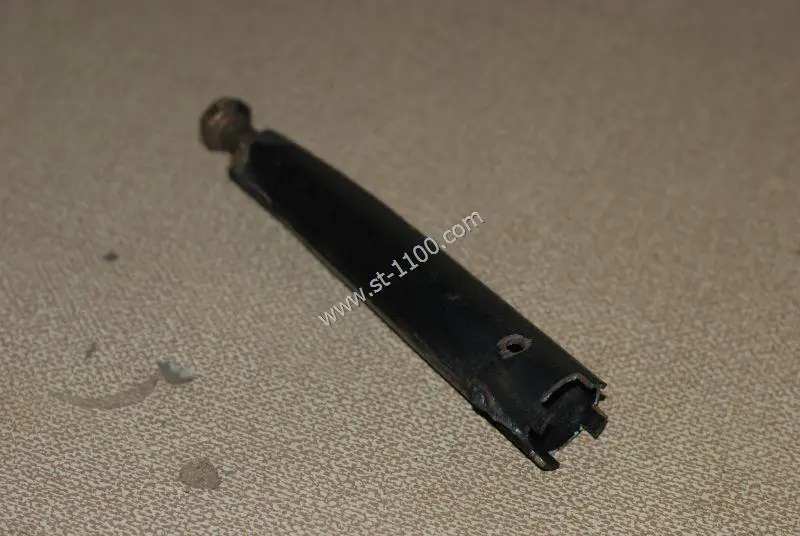
This enables the removal of the pivot bolt locknut.
To remove the pivot bolt itself, I bought a drain plug key off Ebay (Fits Ford, BMW, Lancia, Mercedes and Volkswagen)!
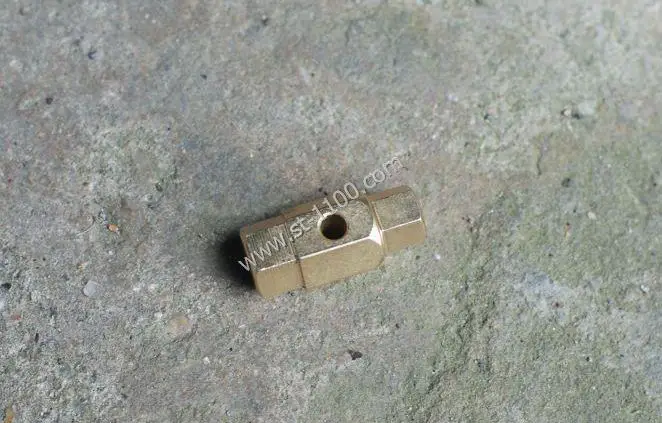
One side takes a 14mm spanner/socket, and the other side a 17mm spanner/socket - just the right size to fit the socket in the pivot bolt.
Propping the swing-arm in place with a chunk of wood, I removed both pivot bolts.
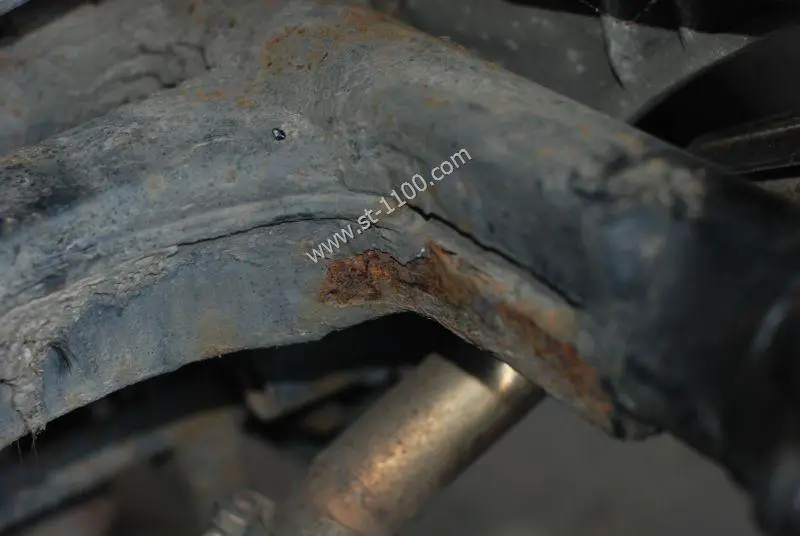
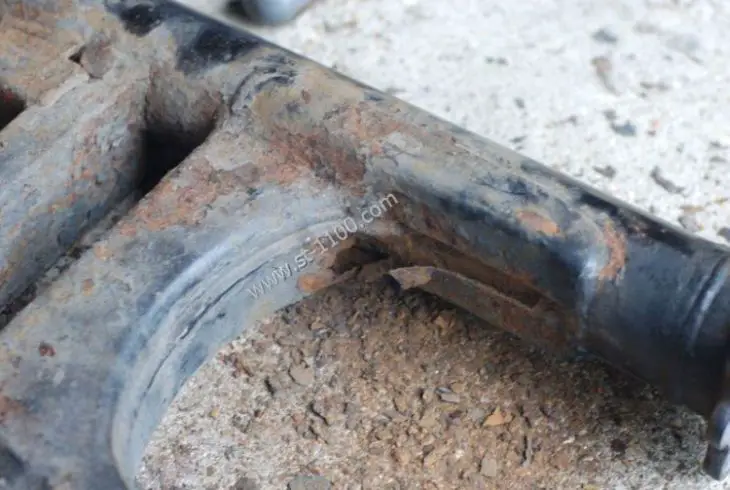
Removing the swing-arm from the frame was a bit of a struggle as there is a lip near the right-hand pivot bolt, but it finally came free. The driveshaft was then removed from the front of the swing-arm.
The driveshaft and universal joint were in very good condition. The swing-arm, however, was not. Here's a closer look at the reason we're doing this:
Before tackling the swing-arm, I decided to remove the stuck stud from the drive housing. This was done by the simple expedient of welding a nut onto the end of the stud. The heat from the welding (and the added grip from the nut of course!) enabled easy removal of the stud.
Finally - repairing the swing-arm itself.
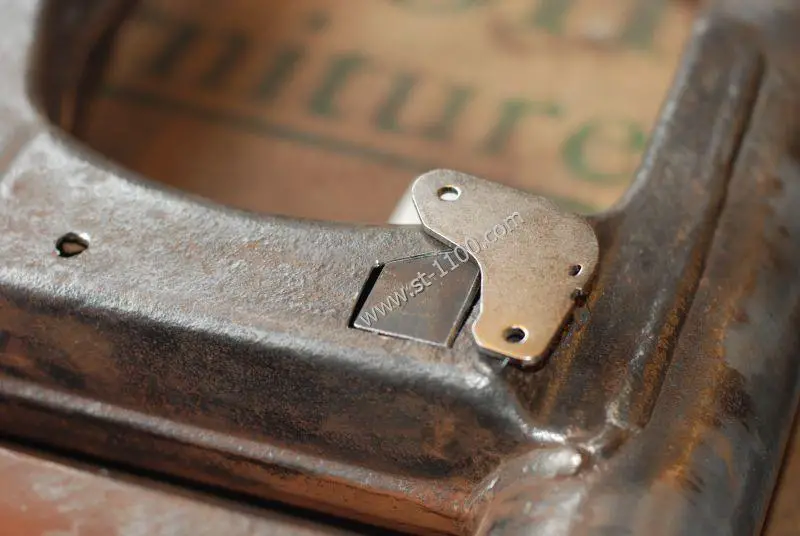
The first thing to do is to remove any badly-rusted areas. I did this with a small cutoff wheel on my Dremel grinder.
Whilst I was at it, I drilled a drain hole so that any water that gets into the swingarm can run out - it's visible on the right of the photo above.
Using some scrap steel, I cut out an infill piece and held it in place with a magnet prior to welding (the magnet comes out of an old computer hard drive - it's neodymium and very powerful!)
For the curved section, I made a template from cardboard first:
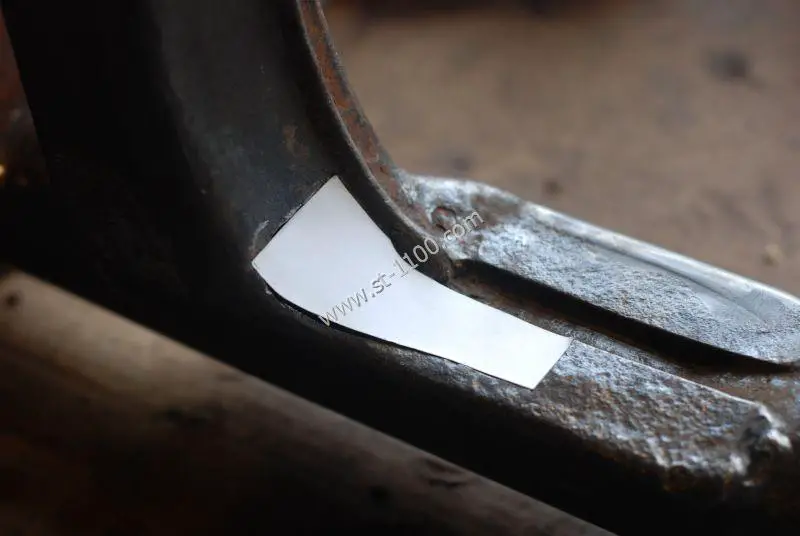
I then cut a section from scrap steel and welded it in place:
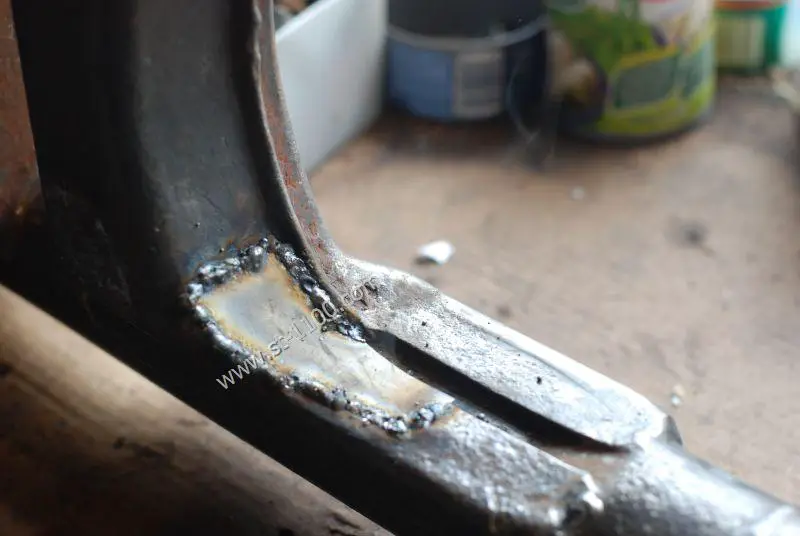
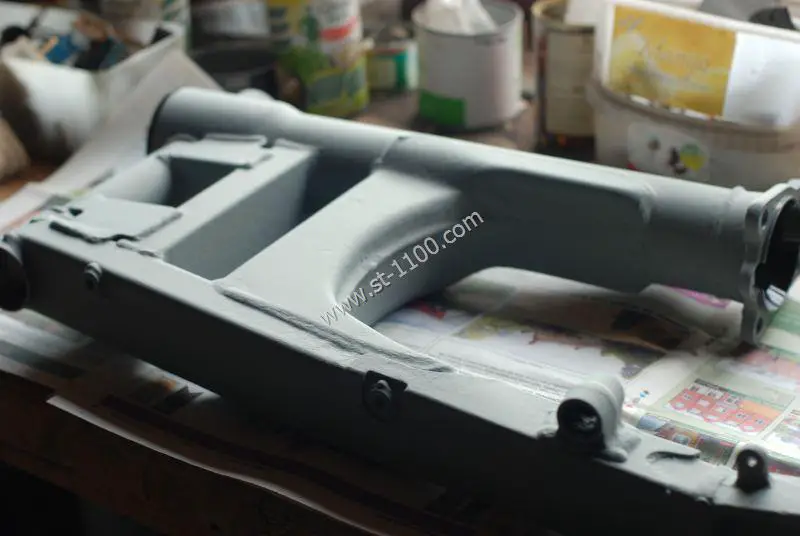
Having smoothed out the welds, I then used a wire brush on the angle grinder to remove all paint and rust from the entire swing-arm.
Once this was done, I wiped down the surface using thinners, and then applied a coat of Unidox zinc primer - this stuff is 90% zinc!
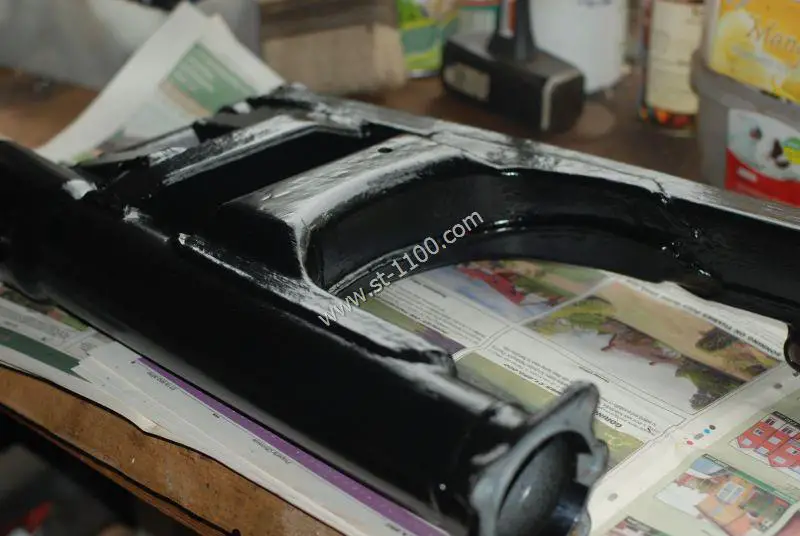
Finally I applied two coats of Hammerite black paint.
Replacing everything
Now, to quote Mr Haynes, "Installation is the reverse of removal".
No kidding.
I coated the driveshaft splines with molybdenum disulphide grease (available in small tubes from your Honda dealer - it's worth buying as it lasts for absolute ages). The driveshaft was then inserted back into the swing-arm, and the rubber gaiter fitted (more fun with this follows...)
Don't forget to put a dab of grease in each swing-arm bearing before reinstallation!
The swing-arm was then reinstalled and the pivot bolts inserted.
At this point you have to make sure that the front drive shaft seal is properly over the lips of the transmission casing. Your friend with two extra elbows can once again lend assistance here - it's a real pain. Unless you remove the entire engine from the frame, which somewhat defeats the objective anyway. (Or unless you have removed the fuel tank...)
The pivot bolts are then tightened to the correct torque - 105Nm for the right and 18Nm for the left. The left pivot bolt locknut is then tightened to 105Nm. Make sure the swingarm moves freely up and down.
The driveshaft housing was then re-attached, and the new shock absorber lower bolt fitted. I used copper grease on all bolts when refitting them; this should prevent future seizures.
I then reinstalled the brake line holding clips, once again having tremendous fun with the front one.
I decided to install a mudguard extension at this stage. Using a piece of flexible plastic (no idea where it came from!) I cut it to fit inside the mudguard, and fitted it using some plastic upholstery clips.
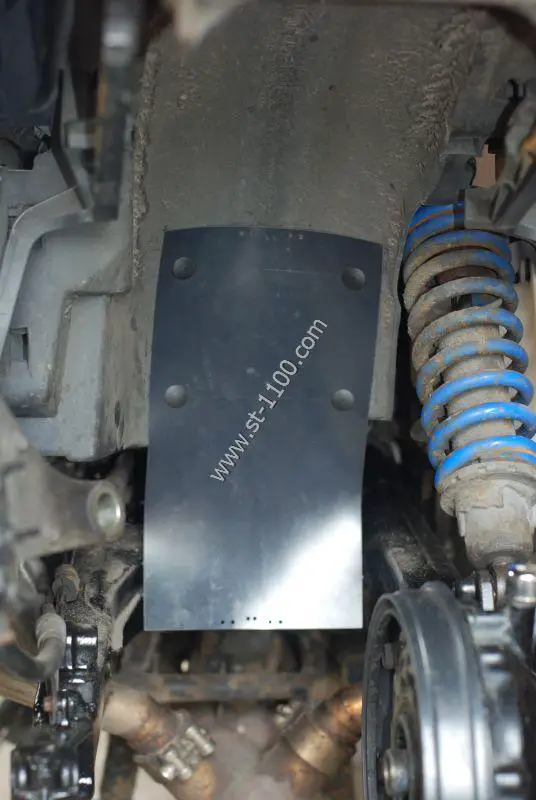
Once fitted, I found it needed to be trimmed slightly to avoid fouling the rear wheel. I think an old rubber car mat would be better - that's a future project for the next time I take the rear wheel off!
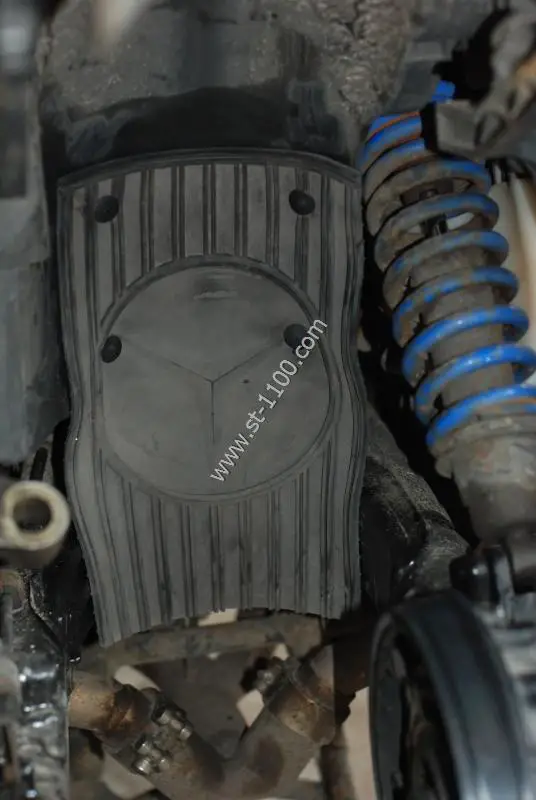
Update: a rubber car mat does indeed fit better; it's more flexible. I particularly like the three-pointed star design:
Finally the rear wheel was refitted, followed by the mudguard, side panels and seat.
So, in conclusion, is it feasible to do this? Yes. Although what you may consider doing is purchasing a second-hand swing-arm from somewhere like Ebay, and renovating that. Then take the bike with the newly-renovated swing-arm to a trusted mechanic and have him swop it over.
(Of course you can then renovate your old swing-arm and sell that on Ebay, recovering some of your costs!)
Did you find the above useful? If so, why not buy me a beer? (Click the "Beer" menu item at the top of the page!)
As mentioned, here are some of the Facebook comments which I managed to recover from the old page. Although these comments were publicly made, I have removed identifying details.
J.R. (2012):
having read your post.. I have to say it was FAR easier to do than yours.... your bike must have been satan! no snapped bolts.. none rounded off... I was shocked and thought that last bolt on the swing arm would be impossible.... but with a long reach spanner it came off dead easy...
B.D. (2012):
ive got to say as a newbie with a pan European, thanks for the info for the swing arm. Like you im a hands on man, including able to weld professionally so the 3 inch hole in my swing arm will be repaired and the second hand one I bought for £50....yup u heard right £50 with no holes is going to get some love before it goes on then i repair the old one.
E.D.C. (2012):
just had the swing arm off for the second time since Ive owned the bike. replaced the corroded swing arm junk with a new one, but, the big trick is I made a rear swing arm protector sheild out of fibreglass moulding. taking it apart again after some 8 years, the swing arm is like new still, not a mark on it. brake hose bolts were rusted solid however....... angle grinder tomorrow.
W.W. (2014):
If the shock absorber lower mounting bolt is seized then undo the upper mounting bolt as the final drive unit can be removed with the shock absorber attached. ABS models require removal of the speed sensor from the final drive, but this is frequently seized - undoing the connector at the far end of the lead allows the final drive to be removed with the ABS sensor in place, however this will require removal of the tank (and air cleaner) because the gap between the tank and frame is too narrow for the connector to pass through...
M.S. (2014):
Yup......its a pig of a job and it will only get done ONCE, so shotblasted, painted with POR 15 (special paint, see eBay) and renewed everything possible whilst it was out. Great write-up, a lot of help-Thanks. "Fargling Iron"........yes, definitely needed for that bloody made-of-cheese bolt. However, Pride-in- good-job factor definitely a 10........:)
Any NEW comments can now be made through Disqus below. And at least this commenting system doesn't lose things regularly like Facebook does.