Despite the ST1100 having twin headlights, I soon found there was a need to appear more visible, especially when filtering. Additional auxiliary lighting was therefore required.
Two inter-connected decisions needed to be made; i.e. what type of lights, and where to mount them.
Type:
Obviously as the main requirement was to get noticed, something fairly powerful was needed. At the same time, because I intended to have these lights on all the time, they had to be not so powerful that they blinded other road users. The physical size of the light was also of importance; if they were too large not only would there be a difficulty in mounting them but this would increase drag dramatically, and also there would be more exposure to impact damage. I had heard of the PIAA auxiliary lights, but found them to be horribly expensive.
Mounting:
One has to be careful to ensure that any additional motorcycle driving lights to be fitted are road legal. It's worth checking first what the regulations are like in your country. Here in the UK, fog/driving lights must be mounted not more than 1200mm from ground level, and at a maximum distance of 400mm from the side of the vehicle (Road Vehicles Lighting Regulations 1989)
The best position for motorcycle driving lights is as high as possible and as far forward as is practical. This ensures not only full utilisation of the light beam but aids in visibility. Also, placing the lights as far forward as possible prevents reflections caused by the light striking parts of the motorcycle. For the reason of height I discounted mounting them on the tip-over wings, or under the headlight. I was therefore left with the choice of mounting them either above or below the mirror housings.
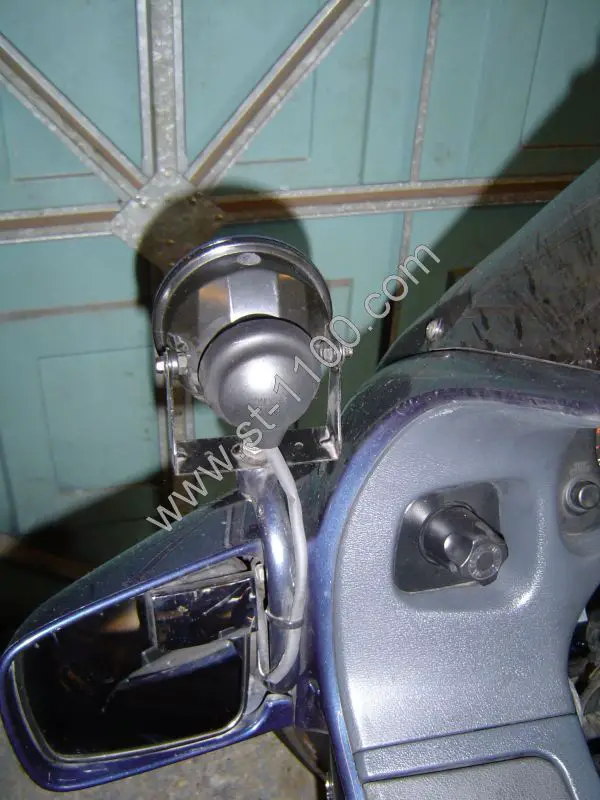
To mount them below the mirror housing would require some brackets originally designed by the ST1100 engineer, the late Ron Major, specifically for the PIAA 910 lamps. These brackets fix to the lower mirror bolt. However, it is necessary to cut a notch into the mirror housing - and I didn't particularly want to do this. Whilst pondering if there was another way to do this, I again happened to see a couple of Police ST1100s on my travels, and noticed that their strobe lights were mounted above the mirrors.
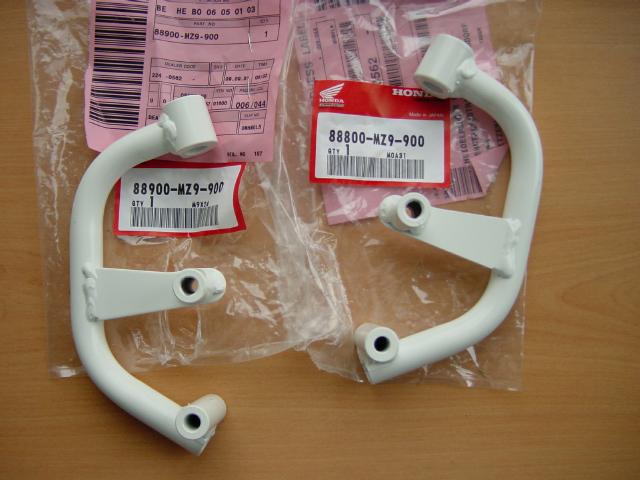
After much research, I discovered that these police mounts are actually a genuine Honda item. Each has a separate part number:
Left-hand side: "Stay,L.FR.PAT" (presumably meaning Left Front Patrol light mount).
Honda part number: 88900-MZ9-900.
Right-hand side: "Stay,R.FR.PAT".
Honda part number: 88800-MZ9-900.
Having obtained a pair of these, I painted them to match the colour of the bike using paint I obtained from
RS Motorbike Paint.
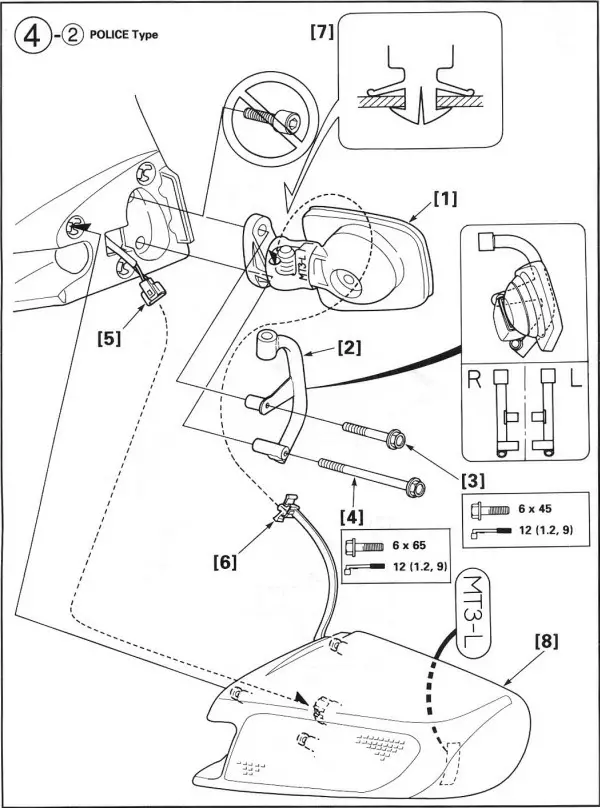
Whereas the Ron Major brackets use only the bottom mirror bolt, the police mount uses both bolts. No modification of the bike is required with the exception of removing the small plastic trim piece between the mirror and the bike.
I then managed to get hold of some Police strobe lights, complete with strobe unit and loom! For obvious reasons I modified the loom to remove the strobe facility, and replaced the bulbs with
11W H3 white bulbs.
I decided to install a separate switch for the auxiliary lights, wired into the auxiliary fuse box via a relay. I did not want them tied in to the High Beams as this would limit when I could use them. All connectors were soldered and sleeved with heat-shrink tubing.
I was careful to route the wiring out of harms way, avoiding any areas that could pinch the wires. Apart from being more visible to other road users, the auxiliary lights had the additional benefit of helping to light up the road ahead (now there's a surprise!) This was particularly noticeable on unlit country lanes at night.