
Right from my first bike, a Honda CB400N, I wanted to be able to listen to music whilst riding. I took an old pair of headphones apart and fitted the earpieces inside my helmet with double-sided tape. With a soldering iron I made up a fairly long headphone lead, and was then able to plug in a Sony Walkman tape player which was tucked behind the headlight.
Once I had acquired my ST1100, something more substantial was called for. I researched various motorcycle audio systems and headsets.
The first thing I had to decide was whether I wanted external speakers, or speakers mounted inside the helmet. Some of the options I considered were:
1. A tank-bag with built-in radio and speakers (I'm not a big fan of tank bags anyway, and a lot of them attach to the tank magnetically. The ST1100 tank cover is plastic. Yes I could have glued a sheet of metal inside the cover, but I did not like the idea.)
2. Speakers mounted in the fairing (this would have entailed removing the headlight adjuster from the left-hand side panel and the clock from the right-hand side panel; I quite like having a clock visible so this idea was rejected)
3. Speakers inside the helmet. I decided to go this route because with external speakers
a) I was unsure of the audio sound quality when at motorway speeds, and
b) I did not want to subject all and sundry to my choice of music when I was stopped at traffic lights!
So having settled on helmet speakers, I then researched the various audio systems available. As well as being able to listen to music, I wanted something that would enable me to add later features such as a microphone for pillion communication, bike-to-bike radio, or even connect a mobile phone. I decided on the Autocom Active 7 Smart unit. At the time this was not available online, and the closest dealer happened to be a BMW showroom. Very snooty they were too!
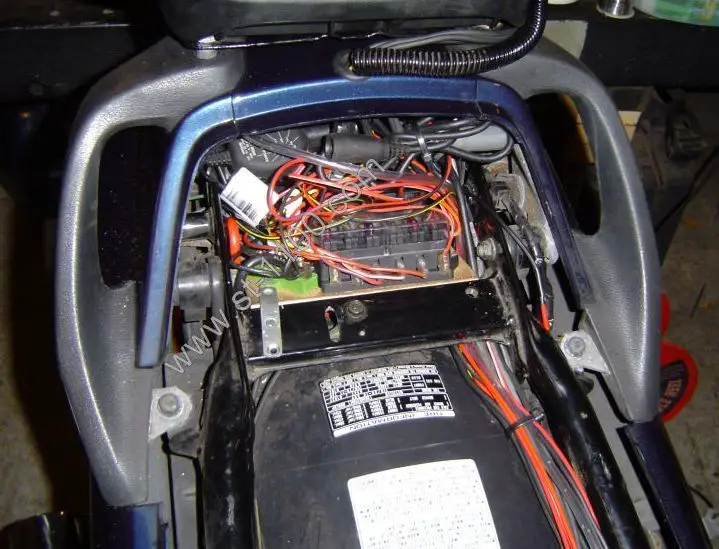
Installation, however, was very simple, the Autocom unit being tucked away in the tail housing and powered via the auxiliary fuse box.
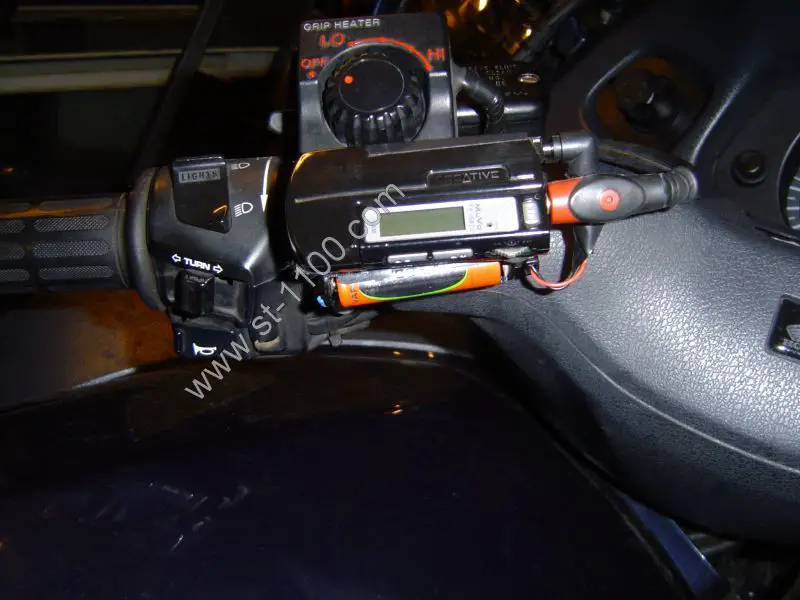
Now I needed an audio source. I tried using a portable CD player velcro'd to the dash shelf, but the vibration whilst riding meant that the CD's were unreadable. I needed a solid-state device, so the tiny Creative MuVo MP3 player came to the rescue. I fabricated a small bracket to hold the player where it was easily within reach of my left hand.
However, the AAA battery was having to be changed daily, so I rigged up an external battery compartment to hold two rechargeable AA batteries. Connecting these in parallel with the AAA battery meant that I was now only having to charge the batteries every two weeks.
(By the way, I'd just like to point out that even when the music is on, I can still hear external sounds like car horns or sirens).
A few months went by, and although I was now enjoying the audio system, I thought that it would be useful to receive radio traffic announcements.
A proper car stereo radio/tape or radio/cd player seemed to be the answer, but where to mount it so it was not exposed to the elements? On the handlebars? Too bulky. On the dashboard shelf? Too deep. In one of the panniers? Possible... but how do I change channels? Ah, a handlebar-mounted remote control perhaps. Hmm, what happens to it when it rains? Also, all the remote controls I saw were infrared, and pushing the tiny buttons whilst wearing thick motorcycling gloves would not be possible.
Then I had a brainwave. What about Marine audio remote controls? Further research on the Internet turned up a Pioneer CD-MR80D wired marine audio remote control. Not available anywhere in the UK as it turned out. Ebay? Ah yes. Having bought the remote control, (and paid the import duty!) I then selected one of the Pioneer stereos which could use it, the DEH-4800MP. It would have been nice to get one with a USB slot so I could use my Creative MP3 player, but this was not possible. I could have the radio with USB, but the marine remote control would not fit, or the radio without USB and the marine remote. I chose the latter option. This model can however be connected to a satellite receiver should I wish to get one at a later date.
Whilst waiting for the remote control to arrive from the USA, I gave some further thought as to where to mount the radio. The only disadvantages I could see with mounting it in one of the panniers were the loss of space, and the inability to easily remove the pannier from the bike (which I do on a weekly basis when checking the rear tyre) without undoing all the wires. The radio needed to be removable as well for security reasons.
As it happened, a friend was selling his Honda Varadero and this had a top box. Although it was a Givi E360 Flow Monokey, something had broken internally which meant the top box could not be locked to the bike; all you had to do was push the button to remove it. I persuaded him to sell it to me. I now had a Givi top box in which to mount the radio.
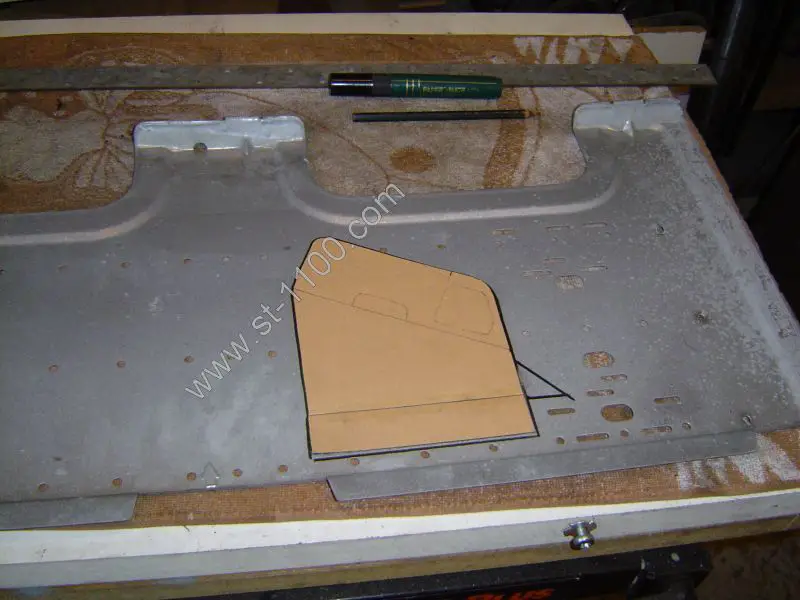
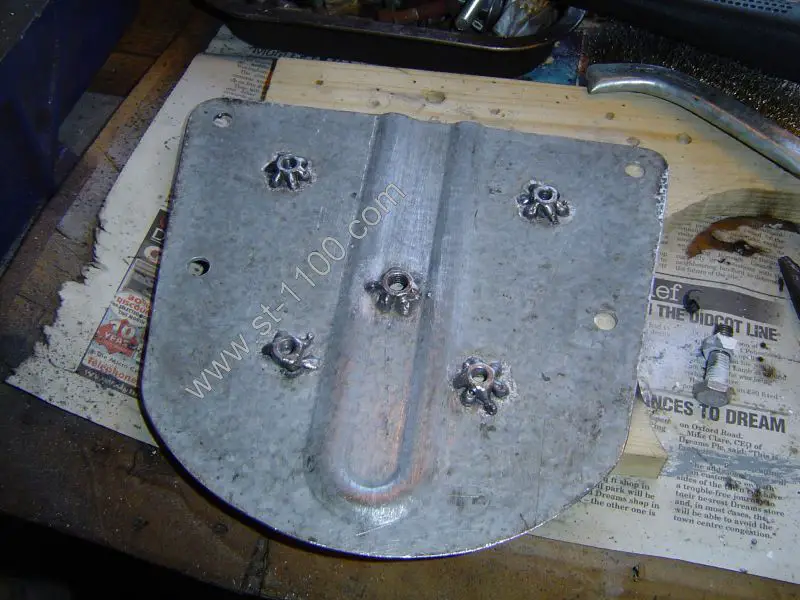
To fit the radio to the top box, I first made a cardboard template. I decided to mount the radio at roughly a 30 degree angle; this would make it easier to access the front panel and insert/remove CD's. A piece of scrap sheet metal to the rescue!
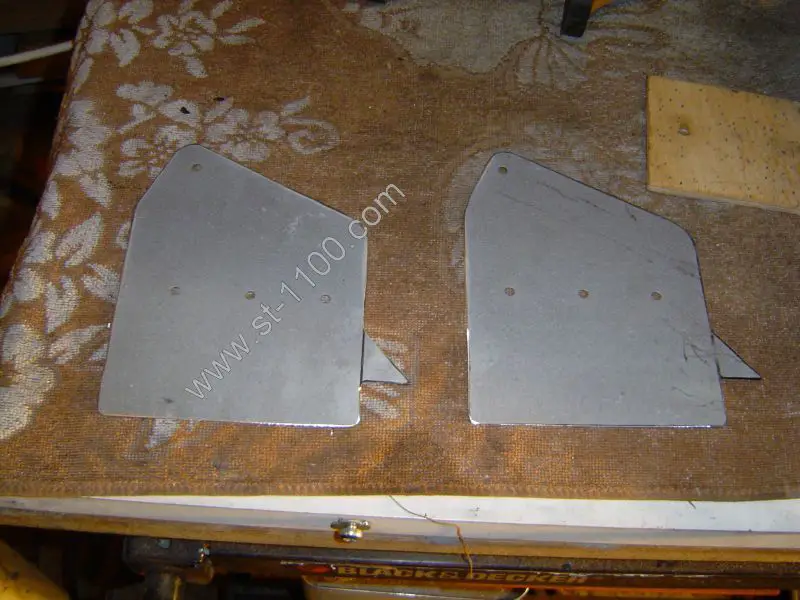
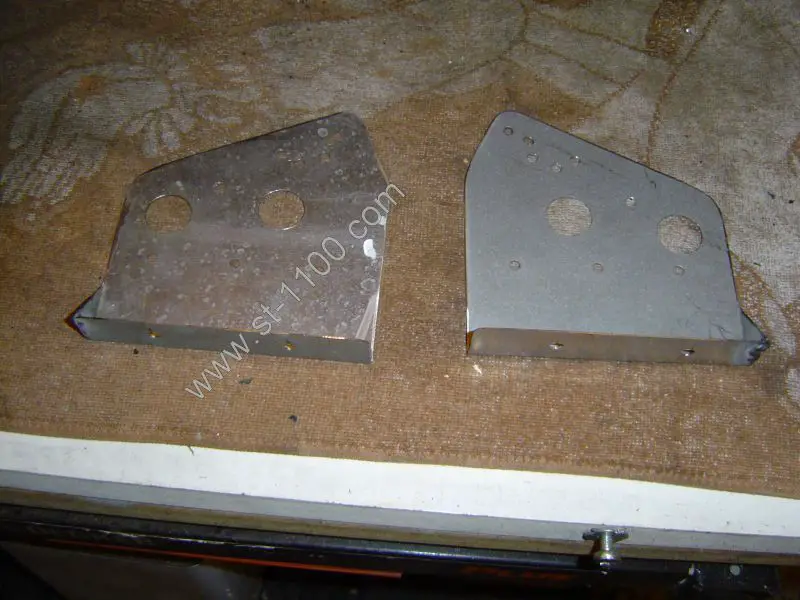
After cutting out the metal brackets:
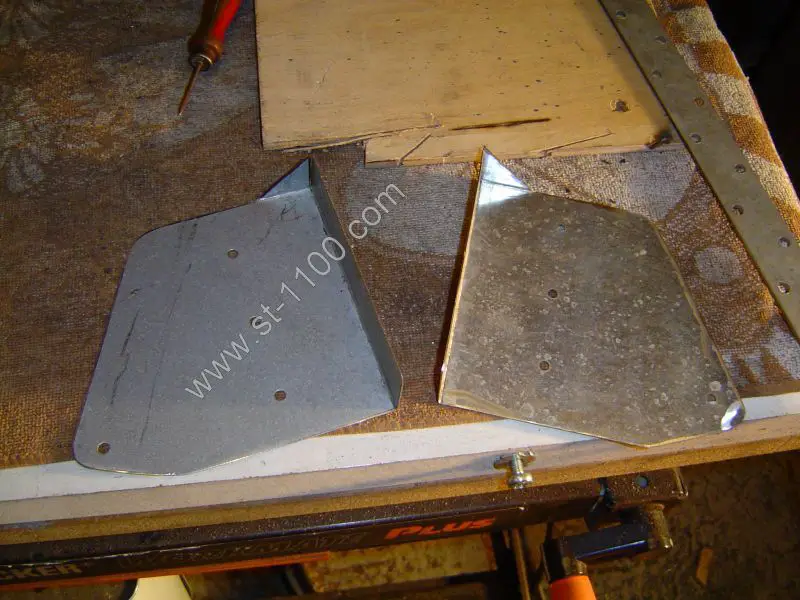
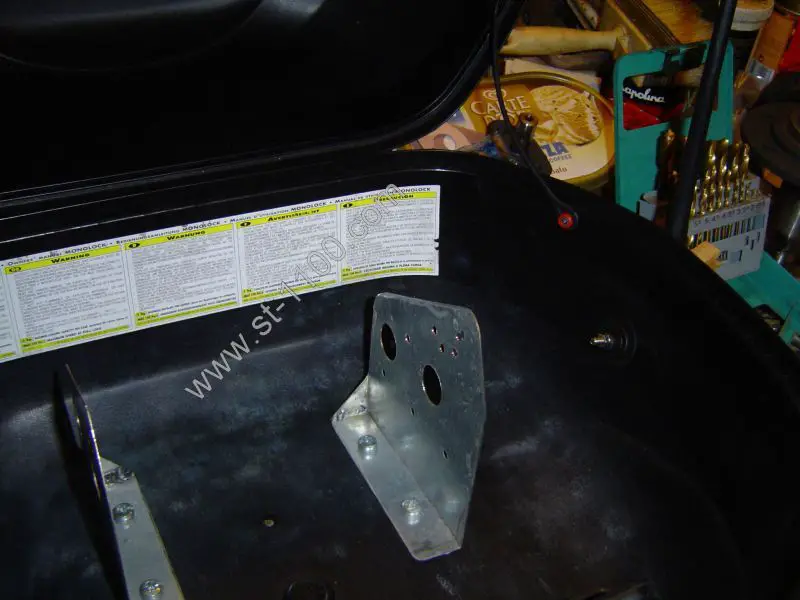
I bent the edges, and then welded the corners:
Finally I drilled the mounting holes. The larger holes are to allow additional airflow.
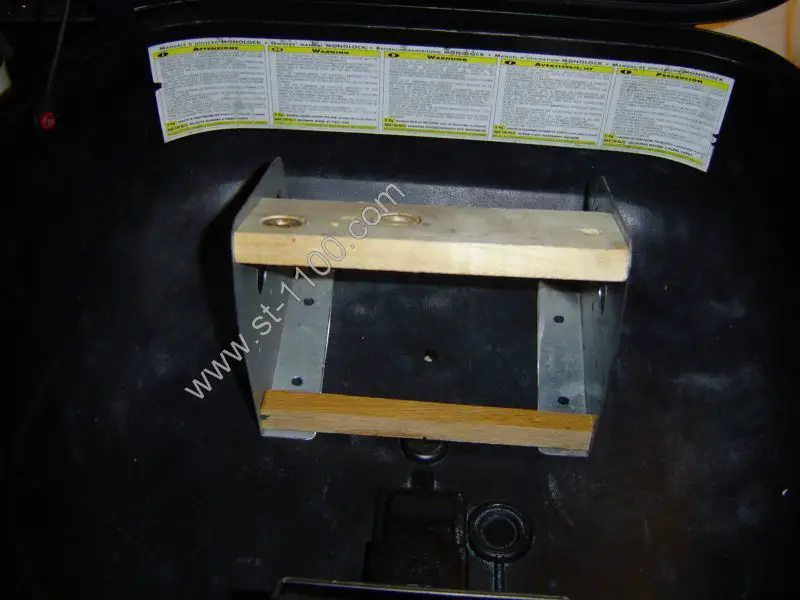
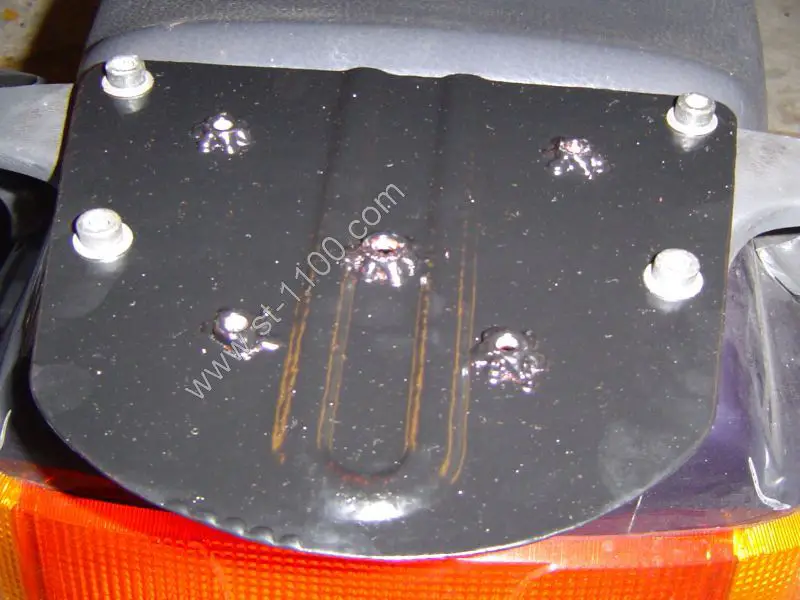
Cutting two pieces of wood to the same width as the radio enabled me to position the brackets correctly in the top box:
These were then bolted in place. I also spent some time considering the location of the antenna mount, and in the end decided to fit the marine aerial to the side of the top box.
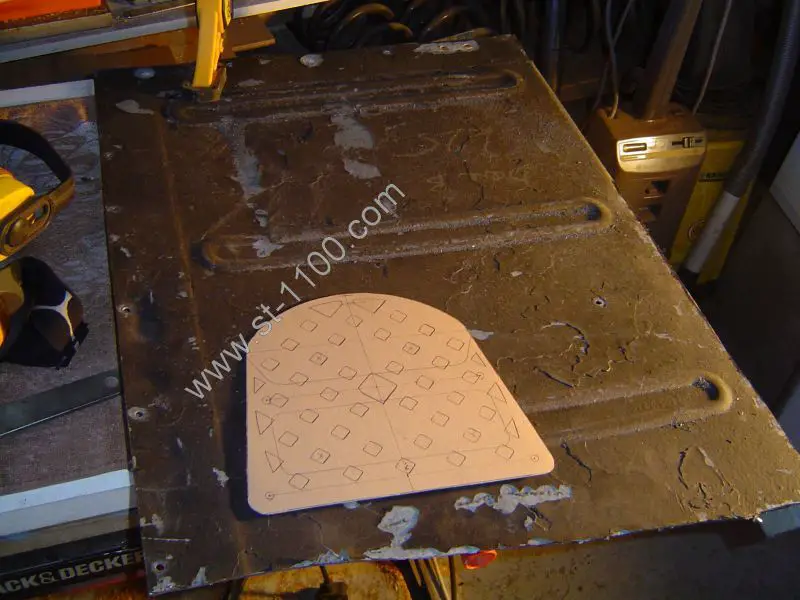
In order to mount the top box to the ST1100, some further fabrication was needed. Firstly I made a cardboard template. I had an old Land Rover tailgate which provided the steel:
After cutting the shape, I drilled the holes which would be used to fix the bracket to the bike, and also welded some nuts onto the bracket - these will hold the Givi mounting plate. Because of the broken lock, the top box needs to be bolted to the bracket using the central welded nut. (Examination of the locking mechanism did not fill me with confidence; it appeared easily breakable).
I then painted the bracket with Hammerite special metals primer, followed by two coats of black Hammerite. The bracket was then bolted to the bike:
The Givi mounting plate was then fixed to the bracket:
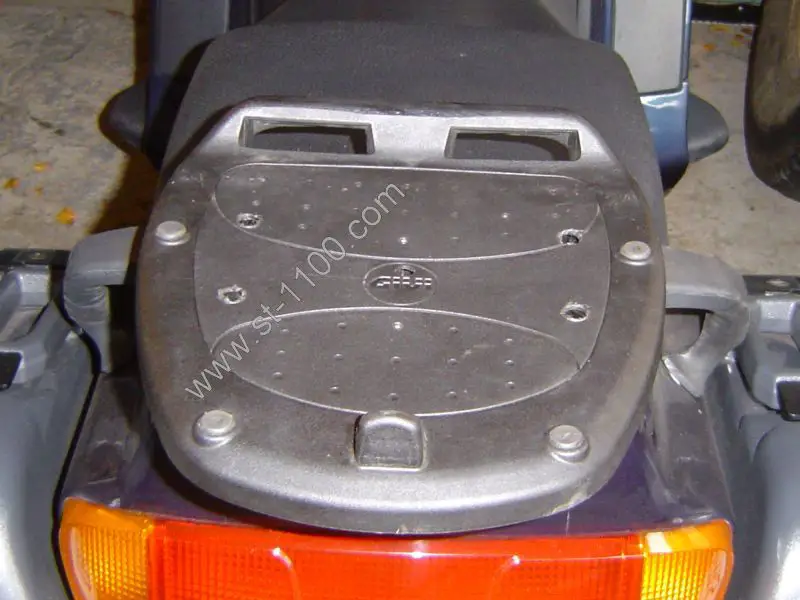
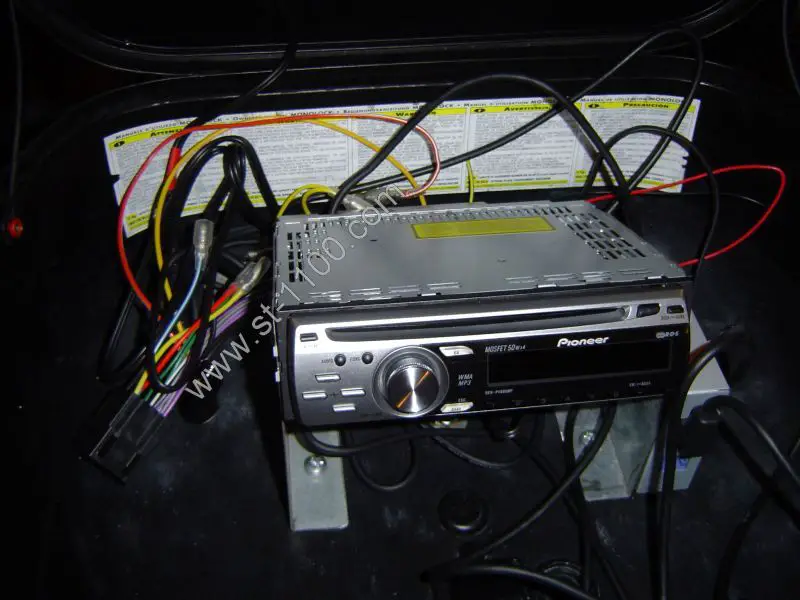
I then drilled a hole through the top of the panel behind the seat to accommodate the radio wiring, and fitted a rubber grommet (TIP: a drop of washing up liquid makes the fitting of this sort of grommet easier). The radio was installed in the top box and all wires connected up:
Here's the installed radio:
Radio Remote Control
When I was considering where to place the radio remote control unit, I took a look at the various mounting systems available, the Ram mount system seeming to be the most versatile. However nothing really met my requirements though, so finally I made my own L-shaped bracket and mounted the radio remote control on the dash shelf:
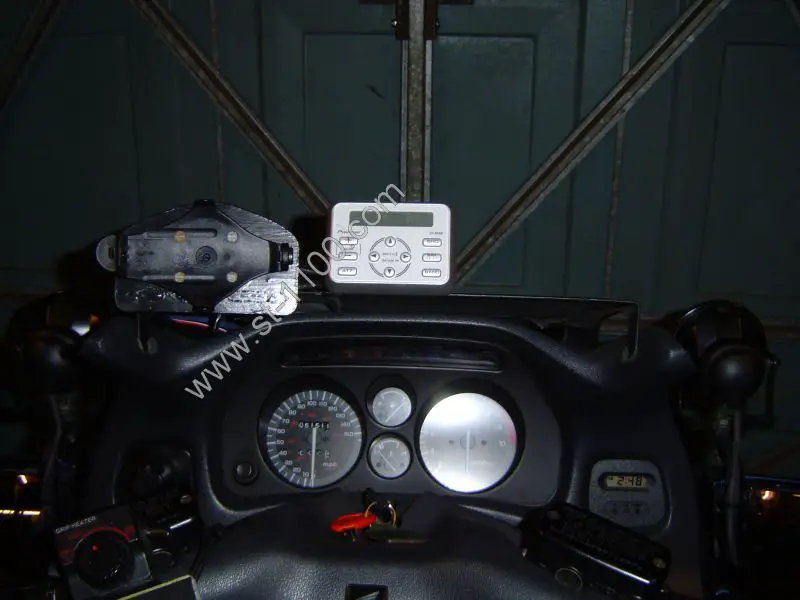
After a few thousand miles, I had a couple of problems. With the location of the remote in the middle of the dashboard it was not very easy to reach. It also interfered with the aerial of the GPS, and I was getting a lot of audio noise interference whenever the GPS was connected.
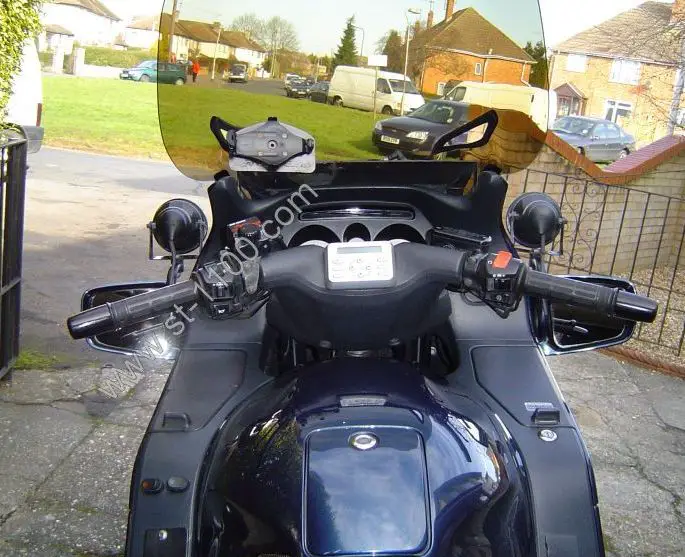
I therefore cut a hole in the middle of the handlebar cover (which I'd had to modify anyway because of the handlebar risers), and having made an internal bracket to securely bolt the remote to the handlebars, the CD-MR80D was fitted to its new location.
It's much easier to reach, and works well. At the same time I rewired the GPS cabling using UTP (unshielded twisted pair) cable - actually an old computer network lead I had lying around.
I also fitted a Ground Loop Isolator with a 3.5mm jack to both the GPS and radio outputs, and the audio noise interference has now disappeared completely. Here's the new location of the remote control:
Update: By 2015 the CD-MR80D remote control had stopped working, and I was unable to find a replacement as it had been discontinued. However by this time USB-accepting car radio head units were widely available, fairly cheap, and of a much smaller footprint. It was therefore possible to fit one directly onto the dash shelf. It has a removable faceplate for security. This enabled me to remove the non-working remote control and also the original head unit from the top box. The Pioneer DEH-4800MP then took up residence in my wife's Hyundai, as her radio head unit had also ceased to function by this time.